I've been getting worried questions from my family about the house progress. "What happened with the house? ...did you run out of money? ...get hurt? ...lose motivation?"
Nope... it just started raining. And kept raining. For weeks. It has felt like forever.
So I did a little bit of sketchup modeling to figure out the framing for the dormer. It didn't turn out exactly like I planned once I got to actually build it, but it was still beneficial to do a virtual practice run first.
I also did some work inside while it was raining. This is one of the ground-floor window sills. I used an angle grinder with a concrete-grinding wheel to level and rough-polish these after cutting out the sill. I decided to install the windows right on top of the 3-foot concrete knee-wall and use the concrete as the sill material. I think being able to see the concrete extend back into the the window opening will tie the effect of the walls together nicely.
Even if it can't really heat the space that much (because it's not closed in yet), a bit of fire inside increases the level of cheerfulness dramatically, and gives a little radiant heat too. This was a good use of all the scraps I generated while working on more rafter tails, eave blocks, etc.
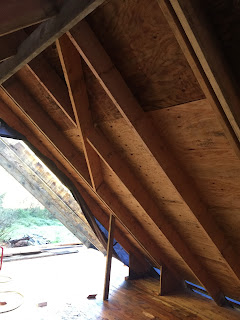
I finally got a break in the weather and jumped right into framing a south-facing dormer overlooking the alders and creek area. I'm envisioning a window seat, hot-chocolate, and lots of bird-watching here. The diagonal piece in this photo is the first of the valley-boards that will form the upper edge of the dormer. Since time is at a premium, both in terms of available vacation time and windows in the weather, I swallowed my pride and hired one of my contractor-friends to help me for a couple of days. It made a huge difference to be able to stay up on the ladder measuring pieces and nailing them in place while someone else was down on the floor cutting the pieces to size. In addition to having two people working at once, there is the saved time of climbing up and down the ladder for each piece.
Here's the second valley-board in place, and the rough opening cut out. Getting this piece of roof out was sort of exciting: after getting the valley boards in place, I cut through the sheathing around the edge of the opening, then pulled out a support stick to let it fall, but it wedged in the opening. Instead, I had to lift it up until it was standing on end, then heave it up and over the rafter tails to fall to the ground. That part actually went just like I imagined it would ...for once.
The two sides of this opening are actually parallel; it's the slope of the roof that makes it look like it tapers together near the bottom.
Most of the roof and wall framing in place.
We took a moment to walk down the hill and admire the dormer from outside and make sure it looked right before going too much further with it. The roof pitch ended up being shallower than I intended because we switched from 2x6 to 2x8 rafters in the middle of the project, but I like the way it looks this way.
Here's an end of the day shot from inside, after getting the tarps back over the roof. My wife immediately pointed out an Easter-Island-statue face peeking through the window when I showed her this photo. Then I couldn't stop seeing it when I looked at the photo either. Now you probably won't be able to not-notice-it either... funny how that works.


