Tuesday, March 14, 2017

Breaking things loose...

I got this far in the project without a truck. I took full advantage of the lumber yards' delivery services, and carried a ridiculous amount of tools and materials around in my little Honda Civic. But, I had reached the point where it was really slowing me down to a crawl, if not a complete stop. 

In addition to the lack of a truck, the weather this winter killed motivation and progress. But, I finally saw a few sunny days coming up, and they happened to land on a weekend, so I went for it.
I rented some scaffolding first thing on Saturday. I had been messing around with wood platforms, ladders, sawhorses, etc. for so long, I can't believe I didn't do this sooner. Oh yeah... I couldn't because I didn't have any way to haul it! I have an ingrained impression that rentals are prohibitively expensive, but this turned out to be a steal: $140 for a month of scaffold rental vs. $800+ to buy vs. many hours of wasted time trying to get by without the right tools.

Set up and ready to close in the second floor walls.

Wall!

Finished framing and covering the endwall on Sunday, and had some time left over so I kept going and installed some windows. I only partially installed one of them inside out, and was able to pull the nails without damaging the window. Really glad I caught that one in time.

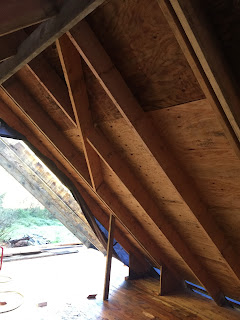
Here's the new wall from inside. It feels much more house-like now. Yay!

Monday was sunny too, so I decided to keep going with the construction. I disassembled the scaffolding and moved it to the other end, and got the endwall framed and ready for sheathing. The next month or so will probably not be as interesting as previous posts, because it will be mostly conventional construction: framing walls, wiring, hanging drywall, etc., but I'll post anyway to keep a complete journal of the project (it will get more interesting at some point). Next steps are to finish closing in the last endwall, and get the temporary power hooked up. It feels great to be moving ahead on this project again!

Sunday, January 15, 2017

2016

me

my mom

my friends

my house

2016 turned out to be a very intense year. The construction work on our house hit the back burner while a whole lot of life happened...

In 2016: I left my employer to start my own business, lost my mom to cancer, composed and officiated a wedding ceremony for good friends at Yosemite's Glacier Point, attended my mom's memorial service and overcame my introverted nature enough to share some memories and appreciation, managed a thriving new business, paid off every bit of my non-mortgage debt, continued work on building my house, and grew a handlebar mustache. I'm emotionally exhausted after that year, but ready to find a new balance and move forward.

Somewhere around mid-2015, I realized that I wasn't going to complete the first phase of the forever-house project (a livable garage) within my planned budget, and that I would have to take on a significant amount of debt to get it done. In addition to the satisfaction of knowing that I've built my family's home with my own hands, a goal in this project is to come out of it owning a house without a mortgage. I realized that the financial opportunities that I needed to meet my goals didn't exist with my employer, and, upon further reflection, I realized that the opportunities I needed didn't exist with any employer. So... I spent about half a year planning my new business and my exit from my employer, and in mid-march 2016, I officially became a self-employed civil engineer, and jumped head-first into a market where my services were in ridiculous demand. I have learned more about being an engineer in the last year than I may have learned in the remainder of my career, had I not taken this leap, and I have solved every single one of my financial hurdles (at the expense of time to put into my house project).

One thing I am grateful for in the timing of this leap to self-employment, is that my mom got to see me taking that leap, and succeeding at it. One of the things I greatly admired about my mom was her businesses; she was starting and running businesses for most of my life, and I am glad she got to see me get a successful start at doing the same.

Now, I'm working to find a balance between my career and other things I would like to devote time to... like building my house!

I left this project with the framing mostly complete, but covered in tarps and needing a roof. My intent was to hire a roofer to do the job. I generally enjoy building, but the idea of working on a very-steep roof, and the associated risk of falling off of that roof, was not even remotely appealing. But, the same economy that gave me a very successful start into self-employment has apparently left roofers unavailable to accept new jobs. So... I took a deep breath and consulted the Google for "how to install shingles on a steep roof". Thus I learned about roof jacks and ladders, and step-flashing and valley-flashing, and the concept of building my roof started to seem a little more possible.

I'm about a quarter of the way done with my roof, and picking up speed as I learn how this aspect of construction goes together. I certainly won't impress anyone with the speed of my work, but... I'm getting it done, and getting it done right. The peace of mind that comes from knowing that my house was built with top-quality materials and no shortcuts is priceless.

....
...
..
.


ps: I can't help thinking of Donkey Kong when I look at this photo...


Sunday, January 3, 2016

I've been getting worried questions from my family about the house progress. "What happened with the house? ...did you run out of money? ...get hurt? ...lose motivation?"

Nope... it just started raining. And kept raining. For weeks. It has felt like forever.

So I did a little bit of sketchup modeling to figure out the framing for the dormer. It didn't turn out exactly like I planned once I got to actually build it, but it was still beneficial to do a virtual practice run first. 

I also did some work inside while it was raining. This is one of the ground-floor window sills. I used an angle grinder with a concrete-grinding wheel to level and rough-polish these after cutting out the sill. I decided to install the windows right on top of the 3-foot concrete knee-wall and use the concrete as the sill material. I think being able to see the concrete extend back into the the window opening will tie the effect of the walls together nicely.


Even if it can't really heat the space that much (because it's not closed in yet), a bit of fire inside increases the level of cheerfulness dramatically, and gives a little radiant heat too. This was a good use of all the scraps I generated while working on more rafter tails, eave blocks, etc.

I finally got a break in the weather and jumped right into framing a south-facing dormer overlooking the alders and creek area. I'm envisioning a window seat, hot-chocolate, and lots of bird-watching here. The diagonal piece in this photo is the first of the valley-boards that will form the upper edge of the dormer. Since time is at a premium, both in terms of available vacation time and windows in the weather, I swallowed my pride and hired one of my contractor-friends to help me for a couple of days. It made a huge difference to be able to stay up on the ladder measuring pieces and nailing them in place while someone else was down on the floor cutting the pieces to size. In addition to having two people working at once, there is the saved time of climbing up and down the ladder for each piece. 

Here's the second valley-board in place, and the rough opening cut out. Getting this piece of roof out was sort of exciting: after getting the valley boards in place, I cut through the sheathing around the edge of the opening, then pulled out a support stick to let it fall, but it wedged in the opening. Instead, I had to lift it up until it was standing on end, then heave it up and over the rafter tails to fall to the ground. That part actually went just like I imagined it would ...for once. 

The two sides of this opening are actually parallel; it's the slope of the roof that makes it look like it tapers together near the bottom.

Most of the roof and wall framing in place.


We took a moment to walk down the hill and admire the dormer from outside and make sure it looked right before going too much further with it. The roof pitch ended up being shallower than I intended because we switched from 2x6 to 2x8 rafters in the middle of the project, but I like the way it looks this way. 

Here's an end of the day shot from inside, after getting the tarps back over the roof. My wife immediately pointed out an Easter-Island-statue face peeking through the window when I showed her this photo. Then I couldn't stop seeing it when I looked at the photo either. Now you probably won't be able to not-notice-it either... funny how that works. 


Wednesday, December 2, 2015

Nothing new here; just a post to let me access a few more photos while I'm on the go... I haven't found a photo-sharing site that I'm happy with yet, and this works.


Tuesday, December 1, 2015

Got the roof covered just in time!

Right now, the sound of rain falling tarps is the most beautiful sound in the world. 


I took another half-day off of work to make a final push on the garage and get the roof covered. I got the rest of the plywood that I had on hand put up on the roof and nailed off... still missing three sheets, but the tarps will cover that gap just fine on this steep of a roof. 

As I halfway expected when I started into the roof-building, the first drops in a forecast 10+ days of rain started falling just as I finished tacking the tarps in place. The actual roofing will have to wait until I get a nice long stretch of clear weather; at least now I can be out of the rain while I work on interior stuff and some areas of the wall sheathing, and the roof sheathing won't get trashed while I wait for the rain to clear.


Monday, November 30, 2015

I took this whole Thanksgiving week off of work with the idea of putting in a bunch of work on the house and hopefully closing it in. Between family commitments and weather, I managed to get a few solid days of work in, and got it pretty close to closed in over the enclosed garage; the area over the breezeway is next.

Production work on the rafter tails. In an effort to stave off boredom, I treated this task as an exercise in optimization... working to improve my workflow and efficiency to get the per-piece time down as low as possible. For each piece, the workflow was: 
  • check for crown and flip if necessary,
  • align the template and mark the outline, 
  • mark the end of the notch cut and the start of the second step cut on the rafter where the saw rail hides the start/end points during the cutting,
  • set the pencil down where I can reach it easily after aligning the template next time, and put the template where it's out of the way but in easy reach after the check for crown,
  • cut the long straight cuts for each step with a rail-guided circular saw
  • cut the bearing notch with the rail-saw, and set the saw down where it's in reach after the marking is complete on the next rafter
  • pick up the jigsaw and move to the end of the rafter, around the left side
  • cut the cross-grain portion of the end notch
  • move to where the rafter is pointing directly at me and cut the rip-cuts on the end notch and the remaining waste in the straight step cuts,
  • move around the right side of the end and make the three curved cuts, starting at the tip and working toward the bearing notch, and toss the waste out of the way,
  • slide the rafter lengthwise so I can keep working from the same position, cut the waste out of the bearing notch, and put the jigsaw where I can reach it immediately after putting the circular saw down next time,
  • then carry the rafter to the torching area and start over on the next one.
 In this first batch of 18 rafters, I started with a time of about ten minutes to cut each piece, and ended up at the above sequence completed in just under 5 minutes per piece.

Here's that same batch of rafters after the scorching and brushing.

My dad and brother-in-law were in town for the week, and helped me with a couple of days of work. It was extremely helpful having some extra hands around, especially during the sketchy business of setting/leveling the ridge board on a chintzy little ladder right at the edge of the second floor deck. I wasn't at all excited about that potential fall, and it was good to have some help. This was the end of the half-day of work on Thanksgiving morning. 

Just a little context shot of the concrete wall, looking down the steps. It's fun to see how the character of these design elements changes and settles into place as they are incorporated into the structure.

These are the spacer blocks for the rafter tails, cut using the same process as for the rafter tails as described above. These were the first real use of the lumber from Diablo (the big redwood snag that I had cut down last spring).

Torching...

...and the finished surface on the exposed edge of the spacer. 

Here's the end of the day on the day after Thanksgiving. Starting to look like a roof!

Another view from the future house location.

...and another view at the usual spot up the hill at the end of the day Friday.

Here's the next batch of rafters. I completed the cutting and torching and brushing on 12 of these in under an hour... I could really feel the impending rain nipping at my heels at this point.

Here's the end of the day shot on Saturday. I got the next 12 rafters in place, and ready to start nailing on the sheathing.

I was able to work on the roof for the second half of the day on Sunday, after spending the first half of the day with my family before they checked out of the rental house and headed down the road. 

Second course of plywood. I'm doing this work from inside, and leaning way over between the rafters to nail the bottom edges. That's way better than trying to work from the top side of a 10:12 roof when it's damp and slippery.

End-of-the-day shot on Sunday. I might have some hope of getting this covered up before the rain is forecast to start on Wednesday.  I had hopes of getting the roofing felt on by the time the rain started, but at this point it looks like I'll probably be throwing plastic tarps over it at the last minute: just after nailing down the last piece of sheathing and just as the first drops of rain hit the roof...